I've been doing a lot of sewing this season - between bouts of the flu. Yes, I had a flu shot but this year's strain got me anyway - and it seems to be the gift that just keeps on giving!
A small group of friends has been gathering at my place on Wednesday afternoons to sew. It started with friends wanting to learn to make my easy market bags
(http://parkersbarkers.blogspot.com/2014/08/easy-market-bags.html)
and we had "Sew Much Fun" we continued with bargello placemats, pillow cases with french seams, quilt-as-you-go table runners and this week we will attempt aprons. I've looked at dozens of apron patterns and tried to select the best techniques to make a simple apron that can be easily changed to make it smaller for kids or larger for more coverage. The choice of fabric types and placement of pockets and matching or contrasting tie makes every one individual. One apron takes about 1 1/2 yards of fabric. The body alone can be made from a one-yard cut.

First, I made a template for the body of the apron from brown wrapping paper. The long left side goes on the fold of the fabric and measures 34-inches (more or less depending on how long you want it). I cut mine just wide enough to leave a 5-inch strip at the selvage for the tie (about 14-inches wide which when opened makes the apron 28-inches wide from the waist down). I like lots of coverage so I wanted the bib 12-inches across at the top - so the pattern measures 6-inches. The short side measures 24-inches. The curve at the armhole can be a straight line or gentle curve as I show - up to you.
On my pattern, I drew a second line 2-inches in from the curve and made a second pattern piece (the white piece) that fits between the lines. Do NOT cut the 2-inch strip off the main body pattern piece! Let's call the 2-inch wide curved strips the tie tunnels.
Here are my pieces cut out and opened up. The top two pieces are for pockets and the long thin straight piece is the tie, folded. This apron uses one long tie. I piece several 2 1/2 wide strips together to make a tie between 4 and 5 yards long so it goes over your head, through the tie tunnels along the curved sides and crosses behind your back and ties in the front. Obviously, the length of the tie depends on the girth of the recipient.
Here are the 2 tie tunnels. Turn the longer edge up 1/4 to 1/2-inch ( I try for a 1/4 but it usually ends up closer to 1/2!) and iron. I used starch to keep it in place.
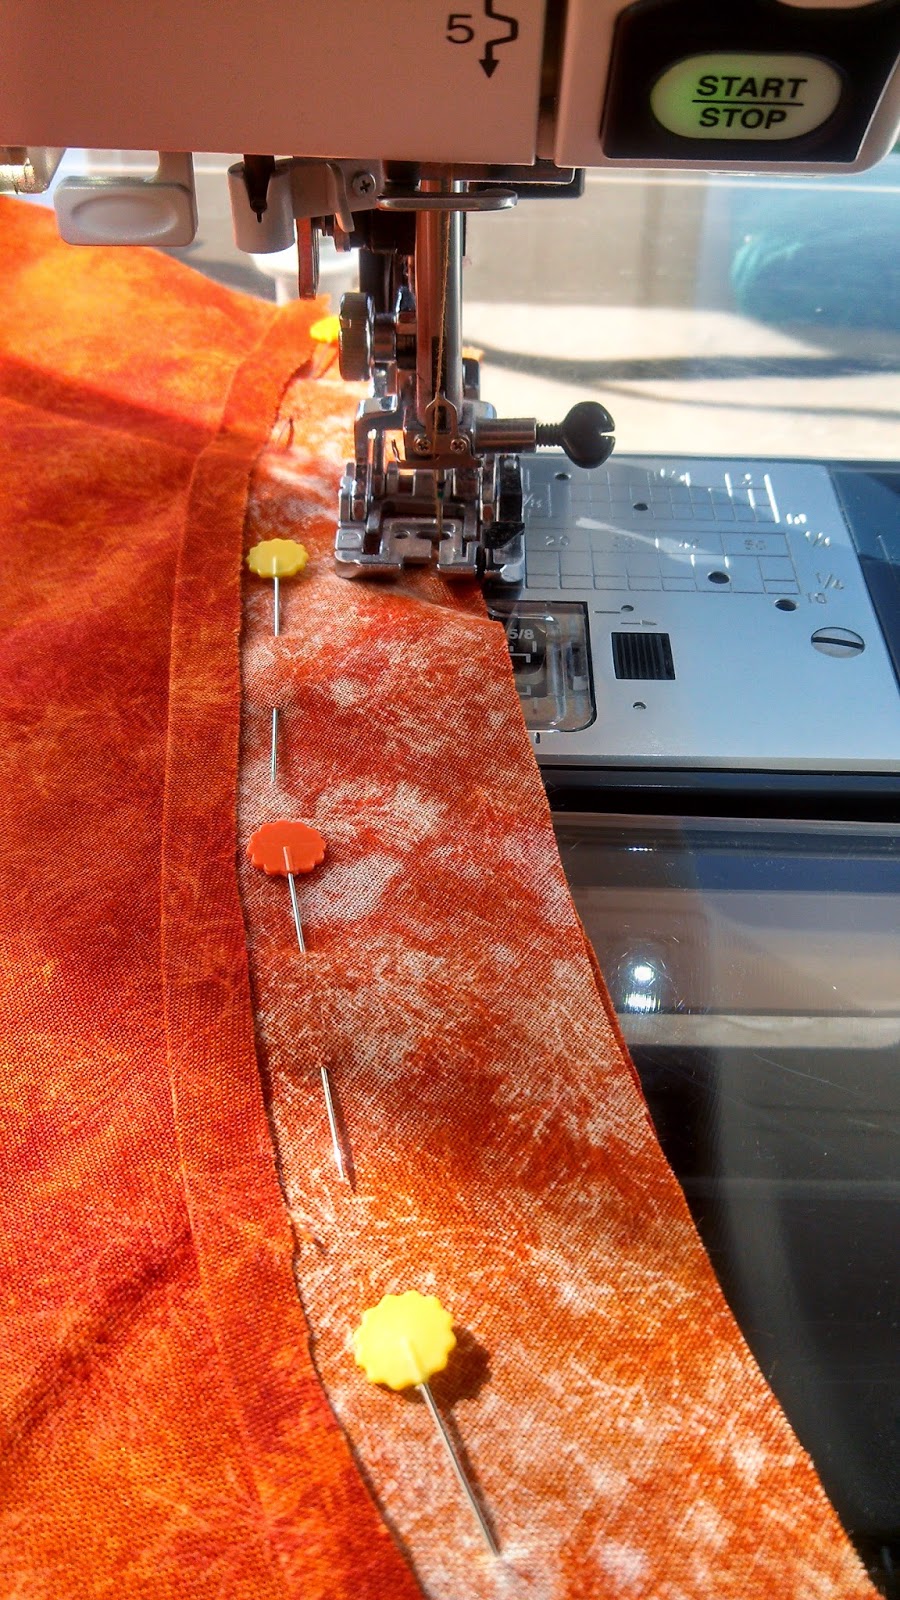
Pin the tie tunnels to the armhole curve, right sides together, and sew in place with a 1/4-inch seam. The tunnels are left and right and will only fit one way.
Iron the seam open being careful not to un-iron the 1/4-inch hem.
Turn the four straight sides (top, bottom and 2 sides) over 1/4 inch and iron. Include the short sides of the tie tunnel. Fold over again, iron and sew. This takes a little finesse as you turn and iron across the open seam.
Turn the tie tunnel to the wrong side and press.
Topstitch the tie tunnel 1/4-inch from armhole.
Turn apron over and sew inside of tie tunnel at hem.
Completed tunnel!
Sew the 2 1/2-inch strips together to make tie.
The tie is folded, ironed and sewn the same way the handles for the easy market bags were made except no batting is used and the tie is much thinner (finished tie is about 1/2-inch wide and can be sewn with a single row of stitches down the middle or two rows each less than 1/8-inch from the sides.
The tie is threaded up through the first tunnel (I use a large safety pin) and down through the second tunnel - creating the adjustable neck strap.
OK - this picture isn't very clear, but I added a long pocket towards the bottom and stitched it in the middle to make two separate pockets. I also added a pocket on the bib so it looks more like a BBQ apron.
Sew Much Fun!